WordPress Web Site presented by AWS Elastic Beanstalk using an Aurora Serverless Database
Aurora Serverless Database
IMPORTANT
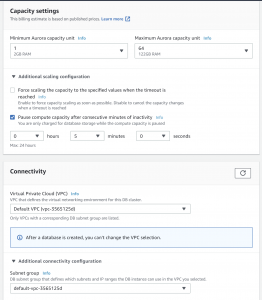
As the Elastic-Beanstalk configuration paused after 5 minutes of inactivity it was sometimes taking a minute to restart when accessed and even failed connecting to the database once or twice; when it did I just refreshed the page and all was ok.
Since starting this post I found out that to make life much easier the RDS and Elastic Beanstalk application should be in the same default VPC.
Interesting reading https://aws.amazon.com/premiumsupport/knowledge-center/security-group-elastic-beanstalk/
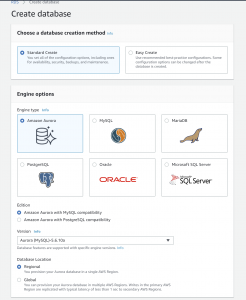
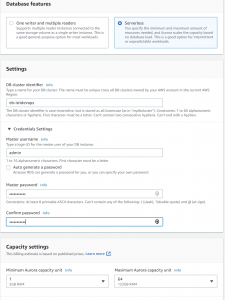
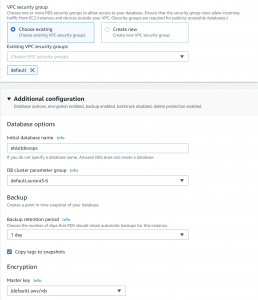
Create an RDS Amazon Aurora Serverless database

S3 Bucket
Now we create an S3 bucket where wordpress will store all uploaded files, e.g. images, photos etc

Select Next until we get to the permissions popup

Select Next and then Create
IAM policy and user
IAM Policy Creation
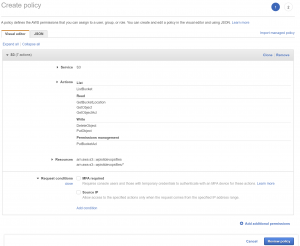
Which produes the following json
{
     "Version": "2012-10-17",
     "Statement": [
         {
             "Sid": "VisualEditor0",
             "Effect": "Allow",
             "Action": [
                 "s3:PutObject",
                 "s3:GetObjectAcl",
                 "s3:GetObject",
                 "s3:PutBucketAcl",
                 "s3:ListBucket",
                 "s3:DeleteObject",
                 "s3:GetBucketLocation"
             ],
             "Resource": [
                 "arn:aws:s3:::wpisitdevopsfiles",
                 "arn:aws:s3:::wpisitdevopsfiles/*"
             ]
         }
     ]
 }

Add IAM user

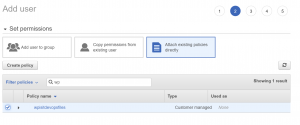
Once created you will be presented with the access key and secret access key, save these as they will be required later.
Download & prepare WordPress
Download the latest version of WordPress https://en-gb.wordpress.org/latest-en_GB.zip and unzip; you should now have a directory named wordpress.
Install plugins
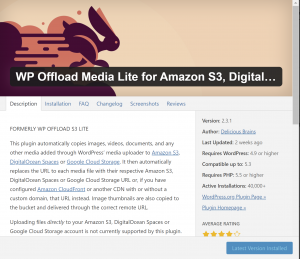
We need to install the WP Offload S3 plugin for S3 media file storage. Go to https://wordpress.org/plugins/amazon-s3-and-cloudfront/ and download the latest version. Unzip the package and save the plugin to “wordpress/wp-content/plugins/”.
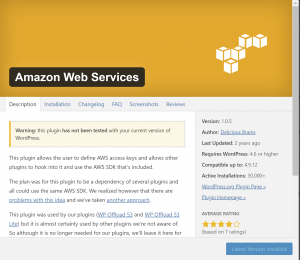
Download the Amazon Web Services plugin from https://wordpress.org/plugins/amazon-web-services/. Unzip the package, and save to wordpress/wp-content/plugins/.
Create wp-config.php
Create "wordpress/wp-config.php containing the following lines; the variables will be defined by the elastic beanstalk configuration file.
Elastic Beanstalk configuration files
Create a new folder "wordpress/.ebextensions"
Create a new file "wordpress/.ebextensions/env.config" with the following contents:

option_settings:
   aws:elasticbeanstalk:application:environment:
     AWS_ACCESS_KEY_ID: 'Your Value'
     AWS_SECRET_ACCESS_KEY: 'Your Value'

     WP_AUTH_KEY: 'Your Value'
     WP_SECURE_AUTH_KEY: 'Your Value'
     WP_LOGGED_IN_KEY: 'Your Value'
     WP_NONCE_KEY: 'Your Value'
     WP_AUTH_SALT: 'Your Value'
     WP_SECURE_AUTH_SALT: 'Your Value'
     WP_LOGGED_IN_SALT: 'Your Value'
     WP_NONCE_SALT: 'Your Value'
     RDS_DB_NAME: 'Your Value'
     RDS_HOSTNAME: 'Your Value
     RDS_PORT: '3306'
     RDS_USERNAME: 'Your Value'
     RDS_PASSWORD: 'Your Value'

The AWS_   access key are the keys associated with the new IAM user created earlier.

The WP_ keys are used by WordPress for security. You can get values for these keys from https://api.wordpress.org/secret-key/1.1/salt/; it is important that once you have the new values from this site that you replace all backticks, `, with a character (I used a) as backticks will cause Elastic Beanstalk to fail.

The RDS_ values are those associated with the aurora serverless database.
e.g.
option_settings:
    aws:elasticbeanstalk:application:environment:
     AWS_ACCESS_KEY_ID: '*************************'
     AWS_SECRET_ACCESS_KEY: '******************%%%%%%%%%%%%%%££££££££££££'

     WP_AUTH_KEY:         '&.hi)m7aaaaaaaaaaaa{0}$JrIw#^8 bE}4bPa?KCz1*/nt_37e5aB:'
     WP_LOGGED_IN_SALT:   'su/Y|&[heaA/aaaaaaaaaaaK!E;{%y|{~WKdvp2k%*!T_wn,wQdqA6w'
     WP_NONCE_SALT:       'wYY(xpUt3)RJH{Ns;f9Waaaaaaaaaaaaajz13eZr;sDFxNRFThLdZFU'

     RDS_DB_NAME: 'isitdevops3'
     RDS_HOSTNAME: 'isitdevops3.cluster-aaaaaaaaaaa.eu-west-2.rds.amazonaws.com'
     RDS_PORT: '3306'
     RDS_USERNAME: 'admin'
     RDS_PASSWORD: 'aaaaaaaaaaaaa'
Prepare WordPress Upload
Create a zip bundle of all the wordpress files inside the wordpress top level directory i.e. do this from inside the directory and do not include the actual directory file itself.
If you are migrating a wordpress site
After creating the empty
- Use the original wp_config.php file to create the .ebextensions file.
- Repalce the original wp_config.php file with the file described above.
- export the wordpress database using the wordpress tools, export option.
- create an ec2 instance in the same vpc as the aurora database (aurora serverless databases are only accessible from inside the vpc).
- Install mysql on the ec2 instance.
- make sure the security groups allow sql commands between the ec2 instance and the aurora db.
- copy the exported wordpress database file to the ec2 instance
- import the wordpress database into the aurora database using a command similar to:
- mysql -u
admin–port=3306–host=myinstance.123456789012.us-east-1.rds.amazonaws.com-prdspassword
Configure Elastic Beanstalk

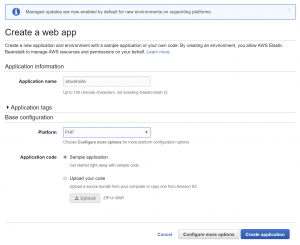
Select “Upload your code” and then “Upload”
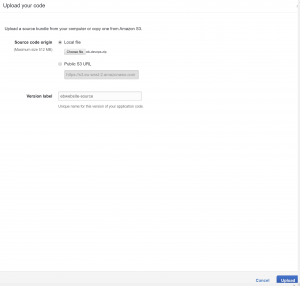
After selecting upload it may appear as though nothing is happening but if you look closely in the bottom left corner of the full webpage you will see a progress counter.
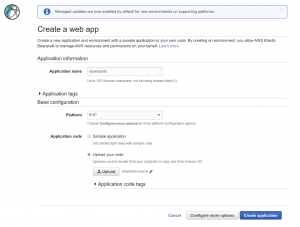
Select “Create application”. This step will take at least 5 minutes.
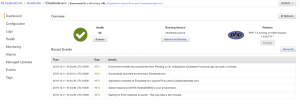
The url will not work yet as we need to allow Elastic beanstalk to RDS communication
The RDS aurora database is in the default security group of our VPC but the Elastic Beanstalk configuration isin its own.
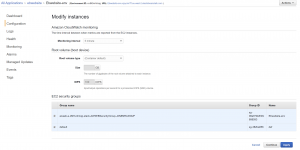
We must ensure that the default SG allows mysql/aurora input.
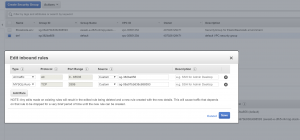
now ensure thet the elastic beanstalk application will allow communication to the “def” security group.
Now try the URL displayed at the top of the previous screen.
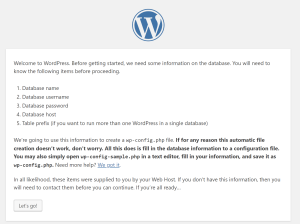
- Enter the details required to configure the wordpress database
- Once configured connect as the administrator
- Apply any updates required by wordpress
- Activate the two plugins we added
- If this is a copy or migration, use the Tools/Import function to import a website export